- WhatsApp: 8613777772066
- Email: [email protected]

The article provides a comprehensive guide on how to use zip tie handcuffs effectively and safely. It covers essential steps such as gathering materials, positioning the zip ties, securing each wrist, confirming the tightness, and safely removing the zip ties. The guide emphasizes the importance of using heavy-duty nylon zip ties and ensuring they are properly positioned to avoid injury and discomfort. You will learn the correct techniques to apply and remove zip tie handcuffs, ensuring both security and safety throughout the process.
By reading this article, others will benefit from gaining a clear understanding of how to use zip tie handcuffs responsibly. The detailed instructions and emphasis on safety precautions will help prevent misuse and potential harm. Additionally, the article’s focus on proper technique and materials ensures that the restraints are both effective and humane. This knowledge is particularly valuable for individuals in security or law enforcement roles, as well as anyone interested in learning about temporary restraint methods.

Before attempting to utilize zip tie handcuffs, it is necessary to collect all essential materials to ensure the procedure is both effective and secure. Correct preparation can considerably influence the success of applying zip tie handcuffs, and the quality of the products used plays a vital function in this.
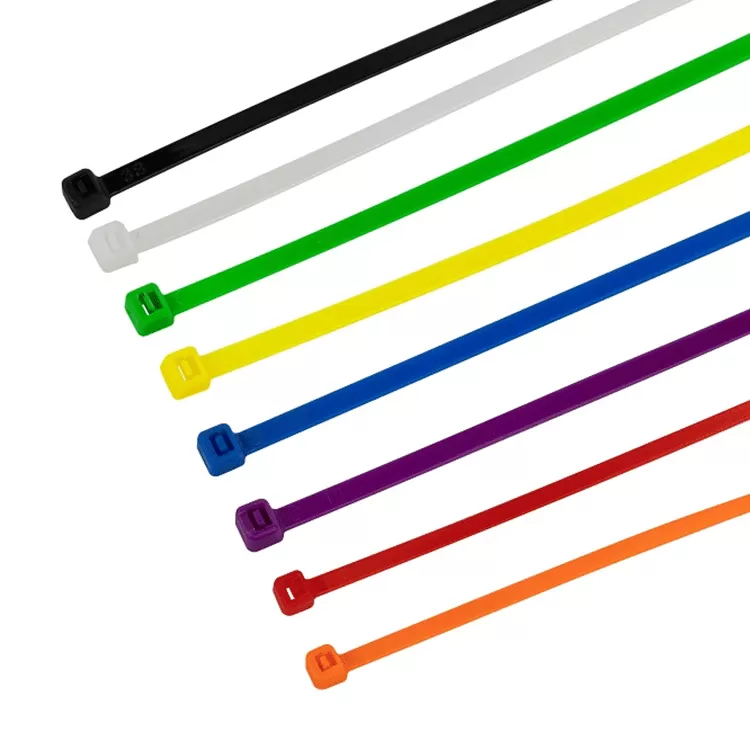
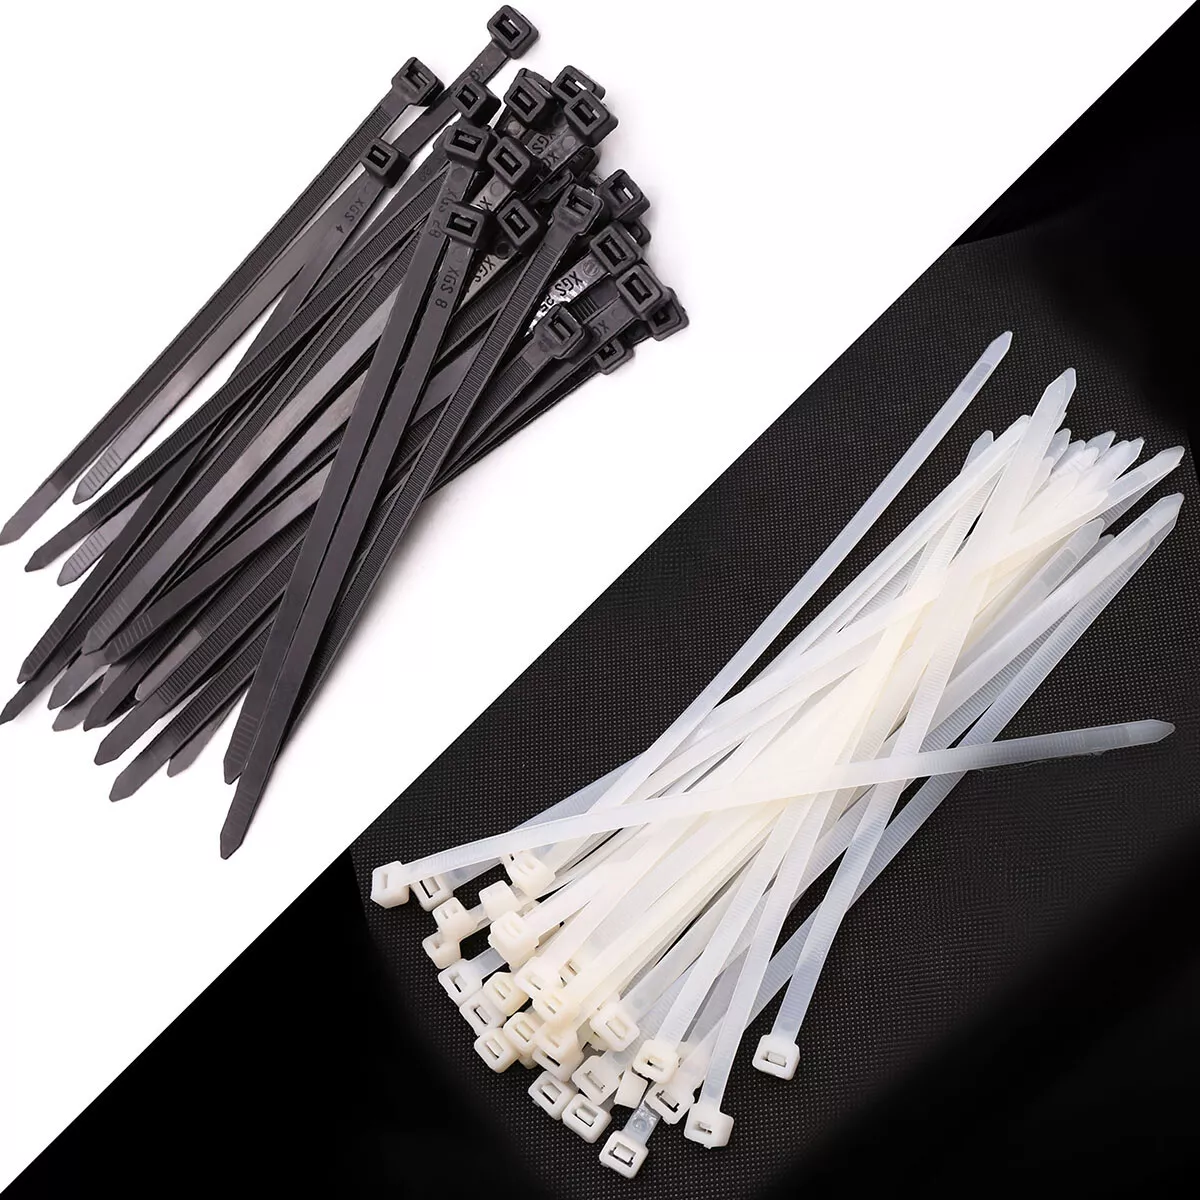
The primary material needed is, obviously, a pair of zip ties. It is essential to choose ties that are strong and long lasting. Typically, durable nylon zip ties with a width of at the very least 0.3 inches (about 7.6 mm) and a length of at the very least 12 inches (concerning 30 centimeters) are suggested. These dimensions give the necessary toughness and size to safeguard a person’s wrists successfully.
Along with the zip ties, you might also require a set of safety scissors or cable cutters to securely eliminate the ties later. These should be quickly available and sharp enough to puncture the hard nylon product.
| Product | Requirements | Function |
|---|---|---|
| Zip Ties | Heavy-duty nylon, 0.3 inches broad, 12 inches long | To safeguard the wrists |
| Security Scissors or Cable Cutters | Sharp, easy to make use of | To safely get rid of the zip ties |
It’s also recommended to have gloves accessible, specifically if you are mosting likely to be dealing with several subjects or if there’s a threat of entering contact with bodily fluids. Gloves not just protect you yet likewise ensure a far better grip on the zip ties, enabling extra specific application.
Finally, guarantee that the atmosphere where the zip tie manacles will certainly be used is risk-free and regulated. This may entail having additional employees to help or limit the specific if essential. Proper lighting is also crucial, as it permits you to see plainly when placing and tightening up the ties.
Source: Xuron
Correct positioning of the zip tie manacles is critical to ensure both safety and security and comfort. Begin by setting out 2 zip ties, making certain they are of suitable size to fit the wrists without causing excessive pain. It’s vital to make use of top notch zip ties that are solid and resilient to avoid simple damage.
Next off, produce a loop with the initial zip tie by threading the sharp end through the locking mechanism. The loop must be big enough to fit around the wrist yet not too loosened. Placement this loop to ensure that the securing system gets on the outside, far from the skin, to reduce irritation and prospective injury.
Repeat the very same process with the second zip tie. Guarantee that both loopholes are identical and that the locking mechanisms are straightened. This alignment assists in applying even pressure and preserving the stability of the zip tie handcuffs. Proper positioning at this stage will make the subsequent steps much easier and more reliable.
At this stage, it is essential to concentrate on effectively safeguarding the first wrist using zip tie handcuffs. Begin by holding the zip tie securely in one hand while ensuring that the locking mechanism is quickly accessible. Placement the loop of the zip tie to make sure that it straightens with the wrist, ensuring that it is neither too loose neither also limited. The proper placing now is vital for both protection and safety.
As soon as the zip tie is placed around the wrist, carefully pull the complimentary end of the zip tie with the securing system. It’s important to guide the wrist into the loop as opposed to forcing it, as this will protect against unnecessary pain and prospective injury. When the wrist is safely within the loop, you ought to begin to tighten up the zip tie by drawing the complimentary end till it fits snugly against the skin. However, care must be exercised to prevent overtightening, which can create circulation concerns or abrasions.
| Action | Activity | Details |
|---|---|---|
| 1 | Placement Zip Tie | Line up the loop with the wrist, guaranteeing correct placing for comfort and safety. |
| 2 | Thread Zip Tie | Gently pull the complimentary end via the securing system. |
| 3 | Tighten Up Zip Tie | Make certain a tight fit against the wrist without overtightening. |
As soon as the zip tie is positioned around the first wrist, it is important to ensure it is tightened up effectively. Begin by pulling the totally free end of the zip tie with the securing device till it starts to cinch around the wrist. At this phase, it is vital to keep a company grasp on the zip tie to avoid any slack that might compromise the efficiency of the restriction.
As you pull the zip tie, make certain to use a stable, even pressure. This helps in accomplishing a tight fit without creating unnecessary discomfort or injury. The goal is to secure the wrist firmly enough to stop escape yet not so limited that it cuts off flow or causes discomfort. To accomplish this balance, occasionally check the rigidity by gently trying to move the wrist. If there is excessive movement, continue tightening the zip tie incrementally.
It is essential to note that zip tie handcuffs are designed to be a short-lived restraint solution. Consequently, it is crucial to keep an eye on the rigidity continually and make changes if necessary. As soon as the preferred tightness is attained, make sure that the locking system is completely involved to avoid the zip tie from loosening up.
Bear in mind, the trick to efficient use zip tie manacles lies in the balance in between protection and convenience. Appropriate tightening up not only ensures the restriction is secure but additionally lessens the risk of injury to the person being restrained.
After securing the very first wrist, the next action is to position and secure the second wrist with the zip tie manacles. This action is critical in guaranteeing that the hands are restrained properly and safely.
Begin by bringing the second wrist near to the first, making certain both wrists are aligned alongside each various other. It is very important to maintain equal tension on the zip tie during this process to stay clear of too much stress on one wrist, which might create discomfort or injury.
Next, loop the free end of the zip tie around the second wrist. Ensure the tie is placed likewise as the first, commonly over the base of the wrist, ensuring uniformity and security. Double-check that the tie is existing flat against the skin without any kind of twists, as this could influence the effectiveness of the restraint and cause discomfort.
As soon as the zip tie is properly placed, begin to draw the tail end of the zip tie with the securing mechanism. Do this gradually and gradually, allowing the tie to tighten around the second wrist. Avoid drawing as well rapidly, as this can bring about overtightening or trigger the tie to jam. The goal is to achieve a snug fit that restricts activity however does not reduce right into the skin.
At this moment, you ought to have both wrists protected by the zip tie manacles. It is vital to ascertain the tightness of the tie around the 2nd wrist, ensuring that it is secure however not extremely limited. You ought to still be able to insert a fingertip in between the tie and the wrist to ensure flow is not hindered.
| Action | Action | Bottom line |
|---|---|---|
| 1 | Straighten the second wrist with the first | Keep equal tension |
| 2 | Setting the zip tie around the second wrist | Prevent spins |
| 3 | Tighten the zip tie | Make sure a tight fit without overtightening |
| 4 | Double-check rigidity | Permit correct flow |
Making sure the appropriate rigidity of the zip tie handcuffs is a vital action in the process. After safeguarding both wrists, it is necessary to confirm that the zip ties are neither as well limited neither too loose. Overly tight zip ties can create discomfort, limited blood flow, or perhaps injury, while loosened ties might fall short to limit successfully.
To confirm the tightness, place a finger in between the zip tie and the wrist to assess the fit. There must be enough space to fit a finger pleasantly without causing extreme stress. If the zip tie really feels too tight, thoroughly launch a percentage of stress by pressing the securing device and carefully drawing back. Alternatively, if it feels as well loosened, tighten it incrementally until it gets to the appropriate snugness.
It is also vital to aesthetically examine the zip tie manacles to guarantee they are equally tightened up and not causing any visible indications of distress on the skin. Look for any redness, swelling, or marks that might show the zip ties are as well limited. Making sure the proper tightness not just improves the efficiency of the restraints yet also prioritizes the safety and comfort of the person being restrained.
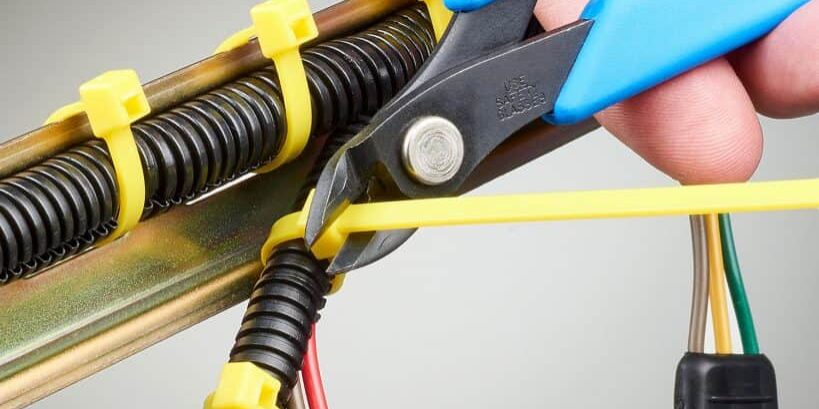
When the zip tie manacles have been firmly secured around both wrists, it is vital to get rid of any excess length from the zip ties to make sure safety and security and convenience. This action is vital to protect against any type of unnecessary discomfort or prospective injury that could emerge from the extending ends.
To efficiently remove the excess zip tie, adhere to these guidelines:
| Tool | Suggested Use |
|---|---|
| Cable Cutters | Gives a clean and accurate cut, making sure the continuing to be zip tie is flush with the securing system. |
| Scissors | Can be utilized if cable cutters are not available, however ensure they are sharp to prevent frayed edges. |
| Energy Knife | Efficient for reducing, yet requires mindful taking care of to stay clear of unexpected injury. |
When cutting the excess zip tie, setting the cutting tool as near the locking device as feasible without harming it. This guarantees that the staying part is very little and reduces the threat of the handcuffs capturing on clothing or skin. Always remove from the body to prevent accidental cuts or injuries.
After cutting, check the continuing to be end of the zip tie to ensure it is smooth and not jagged. A jagged side can cause inflammation or scrapes. If necessary, utilize a file or sandpaper to ravel any type of rough sides.
Effectively reducing off the excess zip tie not only improves the effectiveness of the manacles but also ensures the security and comfort of the specific controlled. This meticulous attention to detail is crucial in preserving the stability and capability of the zip tie manacles.
Making sure the safe removal of zip tie manacles is critical to stop injury and maintain the integrity of the procedure. Right here are the actions to comply with:
| Step | Description |
|---|---|
| 1 | Gather your devices: Before beginning the elimination process, ensure you have a pair of blunt-tipped scissors or a specialized zip tie cutter. These tools assist minimize the danger of cutting the skin. |
| 2 | Position the tool: Carefully put the scissors or cutter between the zip tie and the wrist. Make certain the device is placed as though it does not enter call with the skin. |
| 3 | Cut the zip tie: Apply consistent pressure to cut with the zip tie. It is very important to continue to be calm and specific throughout this step to stay clear of any type of unintended nicks or cuts. |
| 4 | Examine for injuries: Once the zip tie is gotten rid of, promptly evaluate the wrists for any signs of injury or irritation. If there are any type of abrasions or cuts, tidy the location with antiseptic and use a bandage if needed. |
By following these actions, you can guarantee the risk-free removal of zip tie manacles while lessening the threat of injury. Constantly focus on safety and take your time to ensure the treatment is done properly. Contact Us at [email protected] For More Information!

Modern enterprise integrating R&D, production, sales and service
Privacy Policy | Sitemap
Copyright BOESE Co.,Ltd SUPPORT BY :JUNJ